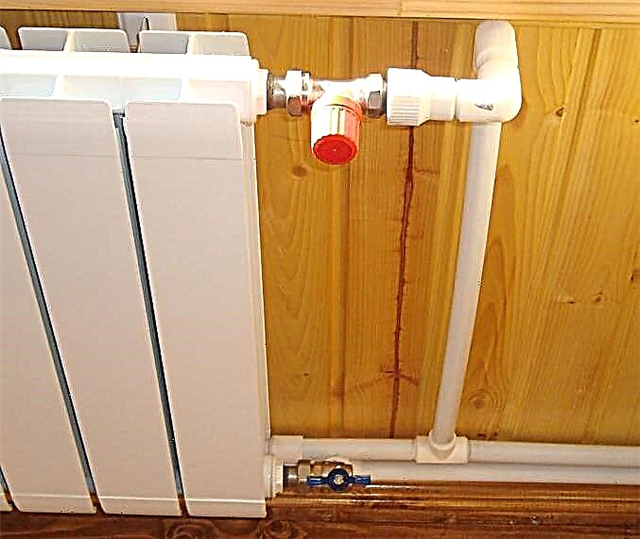
With the onset of cold weather, there is a need to heat the premises. It is not always possible to carry out central or autonomous heating to such premises as a garage, a barn, a corral, a greenhouse. The reasons may be different: lack of funds due to the high cost of connecting such systems or lack of technical ability.
If you make a gas heater with your own hands, it will effectively heat the utility rooms. Now in the market you can choose and buy many different models of gas heaters at various prices and with different characteristics. However, the price includes the biting margin of the seller.
We will tell you how to assemble an almost free homemade product from improvised means. Here you will find a detailed description of home-made devices and instructions on their manufacture. To help independent craftsmen, we offer assembly guides and valuable recommendations.
Features of a makeshift design
The main task that the future home-made device will perform is heating the room, tent, garage and other rooms. With self-assembly, the appearance of the device and its decorative qualities go by the wayside.
An important role will be played by the sufficiency of the amount of heat generated, the safety of operation and the ease of transportation of the device.

Lightweight, portable and user-friendly structures made of gas burners do a good job of heating small rooms
For heating purposes, a variety of home-made gas structures are used. To make heaters from gas burners or from gas stoves with your own hands is not difficult. For quick assembly, you will need a pre-prepared scheme, the material from which the heater will be made, and a variety of tools.
Often, a home-made gas heater is taken on a camping trip out of town or fishing, traveling, for a variety of fees as a source of additional heat. In such cases, it will be enough to assemble the device, check its operability, inspect it for leaks and proceed directly to heating.
Sometimes a homemade heater is planned to be used as an alternative source of heating. For example, in a country house, in a barn, in a shelter, in a garage and in other premises in order to save money on paying for utilities and on the purchase of gas equipment.

Often the prototype for the manufacture of a mobile gas heater are gas infrared burners and factory-made tiles
In such cases, it is necessary to take care of the maximum reduction in heat loss within the heated room. This is done by warming the outer and inner walls, floor and ceiling of the structure. It is most effective to carry out procedures of both internal and external insulation. Then the heat will be kept as long as possible, and the gas consumption will be much reduced.
If it is not possible to carry out two types of insulation at the same time, then you need to insulate the building at least from the inside. It is more efficient. During the procedure, it is necessary to use material suitable for thermal insulation, as well as refractory materials and coatings.

Insulation of the heated room significantly reduces heat loss. In such rooms, the heater will not work for nothing, and therefore, the user will not spend extra money on the purchase of gas
When using gas equipment, you must always observe safety precautions and adhere to the rules for installing equipment and warming rooms. If the heated building is finished with refractory materials, then it will be fire resistant. This greatly reduces the risk of fire and unforeseen fires.
To place a homemade gas heater is best in the center of the heated room. In this case, the heat generated is not lost or absorbed by the walls, since there is no contact with them. Warm air will go up to the ceiling of the room. If you also install special reflectors on the ceilings, then the effect of a heat cap will be created in the room.
This positive phenomenon can significantly save money on space heating with the help of home-made gas structures. Warm air circulates throughout the space and does not leave it. It is worth knowing that the effect of the heat cap is created when the heater emits a fairly intense air flow.

The main quality that a do-it-yourself device should have is operational safety. If a leak is observed when using the heater, stop the gas supply immediately.
According to the assembly results, a home-made heating apparatus should have the following parameters:
- safe and uncomplicated operation;
- economical consumption of energy, in this case gas;
- efficient and fast heating of rooms;
- quick start-up of the device, the possibility of long-term operation;
- ease of assembly and ease of replacement of failed parts;
- the ability to transport the device;
- dimensions suitable for transport, transportation and operation.
All of the above characteristics are quite difficult to fit into one design. However, some craftsmen manage to independently make a gas heater of sufficient power, convenient, easy to use, which serves the user for a long time.
The advantages of homemade gas heaters include:
- Economical work. Sometimes one full bottle can last for 12 hours of continuous operation. Of course, it all depends on the size of the container.
- The ability to quickly turn on and off.
- Compact and light weight. Some home-made designs are convenient for hiking. They do not take up much space and weigh several kilograms. And the beneficial effect of their use is difficult to underestimate.
Among the shortcomings of homemade designs, the need to select a suitable cylinder or the presence of an adapter is highlighted. Therefore, you need to take care in advance of purchasing additional cans. Or be able to transfer gas from a large cylinder into a small tank.

The heat exchanger is an important structural part of the heater. It is a steel box with welded pipes passing through it through it. The heat exchanger is installed in a metal housing. Also mounted fan
Some gas heaters, made independently, do not withstand severe subzero temperatures and do not start if the air temperature is below a certain point. Encountering such a problem can overshadow a hiking trip. However, indoors, the temperature usually does not drop to very low levels.
If the heater works indoors, then it is imperative to ensure the supply of fresh air. It is also important to consider that the level of carbon dioxide in the room increases. Humidity is significantly reduced.
It is impossible to leave the switched on device unattended, and also to bring flammable objects to it. This may cause fire and fire.
The efficiency of a self-designed device is determined by its main characteristics.
Efficiency. This indicator is determined by the ratio of the energy that is used for heating to the energy that is spent to generate it. Gas heaters have different efficiency values.
Safety device. Often, on improvised structures, the installation of devices that ensure safe operation is neglected: valves, sensors that automatically turn off the burner.

The operation of this device is as follows. The burner heats the inner tubes. The air that enters from the outside is heated by the tubes and becomes hot at the outlet. The exhaust pipe removes carbon dioxide from the room.
Fuel consumption and area heated by the device. Depending on the size of the device, fuel consumption also changes. The larger the room, the larger the burner required.
Gas heater device
Combines all the designs with a single gas supply system. Gas cylinders with propane-butane or other types of gas mixtures act as a fuel source. Also, for small heaters, gas cartridges for burners are used. You can carefully fill and pour them yourself. The main thing is to observe safety precautions.
Many homemade gas heaters operate on the principle of infrared radiation. It lies in the fact that the fuel gradually burns out in the burner and thereby heats the heating element, which, in turn, generates heat in the infrared range. Thus, all items of the room or tent are heated. After that, heat is transferred to the air.
DIY gas heaters are quite diverse and can have different weights from half a kilogram to a dozen kilograms. It all depends on the complexity of the design and the required level of heat generated at the output.

Many owners are wondering about finding a more affordable alternative to traditional heating. Home-made installations are a great solution to the problem
Usually, the home-made of their following basic elements is constructed:
- fans that evenly distribute heated air throughout the room;
- a power regulator that allows you to adjust the level of heat and temperature in the room;
- a gas burner that directly burns gas and heats the system;
- thermal emitter - an element that accumulates thermal energy and gives it to the air or to objects in the room;
- gratings that protect the heat radiator from direct contact with objects.
In addition to the basic elements, additional ones will be required, which may include handles, grilles, reflectors, covers, mounts, gas hoses and other blanks.
A device made in this way is suitable for heating small and medium rooms, and small rooms. There is no need for electrical appliances and electricity. When the next cylinder is used up, it will be possible to refuel or buy a new one.

The main advantage of a home-made design is the ability to use inexpensive and affordable components. In addition, the assembly is consistent and simple.
Some home-made gas infrared heaters also perform additional functions, which include heating water, drying clothes and various items. Using some device you can also cook food. At night, such a heater glows and is a source of additional lighting.
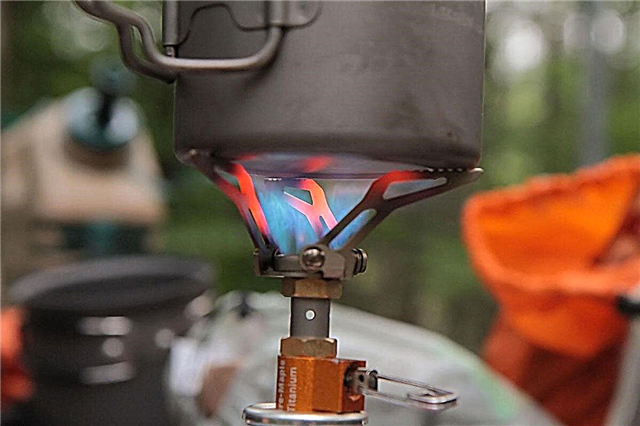
Homemade device from a gas burner
Our proposed method can be assembled not too powerful, but convenient, compact, portable gas heater. Such a device is suitable for heating small rooms, a garage, a small greenhouse, basement or tent.
To assemble the structure, a gas stove-primus is used. It is used for cooking. This scheme is also applicable when using collet valve cylinders.

Gas burners and stoves are connected to steel or composite gas cylinders. They work from any mixture of liquefied gases
In addition to the burner, the following improvised material will be required:
- tin sheet of a small area;
- round metal sieve;
- rivets.
Some tools will also be needed: an electric drill with a small drill, a riveting device, and metal scissors.

The operation of improvised gas devices requires increased attention to detail from the user. User safety directly depends on whether safety is respected or not.
The assembly of the device is as follows. First you need to take a pre-prepared tin sheet and attach a sieve to it. The sieve should be circled with a marker or construction pencil around the circumference.
After this, a sieve is laid down and a rectangular ear or so-called sweep is neatly finished with a pencil with a ruler on the sheet over the circle. One eye should be slightly longer than the remaining three.
Then you need to take the scissors and carefully cut out the cut blank. It is important to cut parts so that there are no bumps on their surface.
After the circle is cut from the sheet, it must be attached to the burner with bolts. To do this, you need a drill with which to accurately drill even holes. Then you need to trim the drilled holes and erase the remaining metal with a file or cut (undercut) with a grinder.

As a result, it is possible to assemble a heater with a vertically or horizontally located gas can. It depends on the type of burner and the desire of the collector.
In the resulting construction, you need to bend the rectangular ears from above and attach a metal sieve. The main task of the sieve during heater operation will be heat dissipation. This design can be improved by the additional use of mesh.
First of all, another circle with ears is additionally cut out of the tin sheet. Its dimensions must match the dimensions of the first part. Then, using a drill, it is necessary to drill holes in the cut circle, which should be located at a small distance from the edge of the workpiece. After that, you need to cut a small strip of mesh.
The cut narrow strip is attached above the sieve to the first and second tin circles behind the ears with the help of rivets. The ears should be bent at an angle of 90 degrees. As a result, the design will resemble a metal cylinder.
After making such a gas heater with your own hands using a gas burner, the design must be checked. You need to make sure that it can be used safely. The gas canister is connected to the burner, the gas supply is turned on, the burner is ignited, and the device starts heating the room.
Using an adapter hose, you can connect such a burner to a large gas bottle. Then you do not have to spend additional time on replacing and refueling the gas tank. A gas reducer must be installed on the cylinder, which protects the structure from the reverse gas movement and allows you to adjust the pressure.

It is convenient to transfer gas from one tank to another, as well as connect the heater to a gas source with such hoses of homemade or factory production.
It is worth remembering that manufacturers of gas sprays do not recommend reusing their products and refueling sprays.
Using a similar approach, you can design a larger homemade gas heater. Such devices will already resemble gas stoves and can be powered directly from a gas pipe or large cylinder. Naturally, the power of such a furnace is enough to heat a larger room.
However, such structures are not so easy to move from one place to another; they take up a lot of space and often require additional construction of a chimney and a ventilation system.
Tile heater
Small-sized rooms, a garage, a greenhouse, a tent are conveniently heated with a portable desktop gas heater. Such a device is constructed from a quadrangular flat tile equipped with a metal grill.
The collection of this device involves attaching part of the gas stove to a metal casing. Due to the installed combustion chamber, air is heated to the desired temperature, and several or one fan provide the supply of warm air and its circulation throughout the room. The assembly of such a device consists of several stages and does not require special technical knowledge.

The gas heater made according to this scheme is more powerful than the previous version. With the help of such a device it will be possible to heat small rooms even in winter
The first stage is working with measuring instruments. Using a ruler or tape measure, you need to take accurate measurements from a quadrangular tile. This is required to determine the parameters of the heater body. After the measurements, you need to cut the blanks from the tin sheet with scissors. Next, the workpieces are fastened with rivets to the casing.
Then the casing is fixed with hooks on the tile. In order to be able to quickly remove and mount it back, you need to make a movable bar. It is easy to make such a bar using a small spring, which is connected to the lifting lever.
Thanks to this decision, in the future it will be possible to easily remove the casing for cleaning or transportation. The considered home-made scheme requires a special ventilation system. To install it you will need a banal fan without any additional complex devices or materials.

Instead of tiles, you can also purchase a ceramic infrared burner. The infrared heating system provides for the distribution of heat similar to solar radiation. Such heating does not heat the air, but objects that then radiate heat
To install ventilation, a small fan from any home device is suitable. You can use scissors to fit the size. Trimming and shaping the size of the fan blades takes about half an hour. After carrying out these steps, you need to install a ready-made fan at the back of the heater body, so that there is draft inside the case.
You also need to install a metal combustion chamber. The body of the combustion chamber must be littered with many small holes. They can be made using an electric drill and drill for metal or with a hammer and nail. The holes should be a short distance from each other.
You also need to buy a rubber hose with an adapter for connecting a flat tile to a gas pipe or gas cylinder. A fan installed at the back of the casing provides the supply and distribution of warm air over a fairly wide range in the heated space.

Through the hose, gas enters the burner. The burner burns a resource and heats the heat emitter, which gives off thermal energy to the room. At night, such a heater illuminates a small area around itself.
Such a home-made gas heater copes well with the task of heating the room, not only in the autumn-spring period, but even in the winter season. Also, such a device economically consumes gas and has a high efficiency.
Pipe heater construction
This makeshift design is also called the heat gas gun. It emits significantly more heat than previous heaters, and absorbs more energy resource.Also, such designs are often equipped with chimneys, which makes them bulky and difficult to carry.

With the principle of action and design features of a gas heat gun familiar circuit. The heat flow generated by the appliance is distributed by a fan.
To assemble the heater yourself, you need to collect the following material:
- three meter pipes of various diameters (two of 8 cm and one of 18 cm);
- steel plates with which the fastening will be carried out;
- Metal sheet;
- gas torch with piezo ignition;
- axial fan.
You will also need a variety of tools: drill, welding machine, tape measure, level, grinder, metal scissors. Pipes can be replaced with cylinders or fire extinguishers of suitable diameters. A grinder will be needed to cut the bottom and top, as well as shorten the workpieces.

Working in intensive mode for heating a room with an area of 15 square meters, a forty-liter bottle lasts about a week. When working, the gun dries the air, so you need to moisten it
Two holes of different diameters are drilled in a pipe with a diameter of 18 cm: 1 cm and 8 cm. They need to be drilled opposite each other.
A cut of 30 cm is cut from a pipe with a diameter of 8 cm, which will be a combustion chamber. Fasteners are welded to this pipe and a hole with a diameter of 1 cm is drilled in it. Then this pipe is inserted into the first pipe.
From the sheet of metal you need to cut the plug. It will close the gap between the heater body and the combustion chamber. A combustion chamber is welded to the body, and a nozzle for removing hot air is connected to the hole with a diameter of 8 cm. After that, a plug is welded. After making sure that the gas burner is firmly attached to the combustion chamber, you can push the hose through the centimeter holes.
A fan is installed on the back of the device, and a chimney on top. In order for the heater to stand steadily on the surface, legs should be welded. Gas heat gun efficiently heats rooms, economically consumes gas. However, safety precautions should be followed when using it.
Canister gas heater:
Homemade infrared gas heater:
Anyone can assemble a gas heater according to the considered schemes of the house. It is only necessary to follow safety precautions and not to neglect instructions for putting devices into operation. If you assemble a heater yourself, you can save money. In addition, the effectiveness and efficiency of such devices is not inferior to the store ones.
If you plan to heat a small room or tent, as well as take the device on trips and hikes, then it is better to make a heater from a gas burner or from a gas stove. They are more compact, take up less space and are easy to transport. Heat gas guns are suitable for heating larger rooms, emit more heat and require an electrical connection for the fan to work.