The installation of new plastic windows leads to the sealing of the premises. Without an influx from outside, natural air exchange in a private house or apartment ceases. One way to resume ventilation is to use a supply valve built into the wall of the building. In this publication, we will consider the designs of these devices and tell you how to install a ventilation valve with your own hands.
Types of wall air supply devices
To supply fresh air inside residential and any other premises, 3 types of valves are used:
- passive wall ventilators (natural influx);
- transfer devices;
- forced-air and exhaust air handling units with air heating due to heat recovery.
Note. The cheapest and most primitive means of ventilating rooms are window ventilation valves (manufacturers: Aereco, Air Box, Vents). The disadvantage of ventilators is low throughput. We wrote in detail about the principle of operation and installation methods in a separate article.

In addition to these products, the apartments use the so-called breathers - wall-mounted household appliances with forced discharge and automatic heating of the air to a predetermined temperature. Breathers are full-fledged supply units, whose price is 3-5 times higher than any ventilation valve.
Natural flow valves
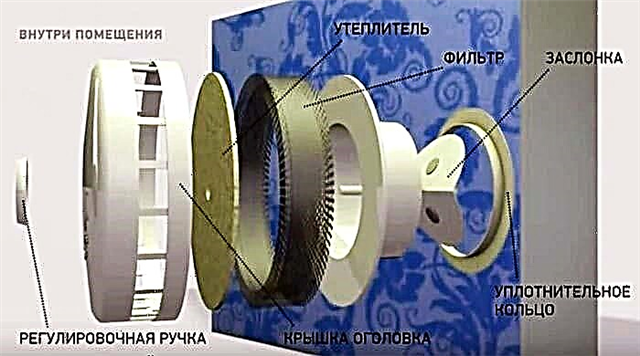
We will consider the device of a wall ventilator using the example of a rather popular product KIV-125 from the brand KIV. Similar valves are manufactured by Vents, Domvent, Aereco. The design of the household appliance includes the following elements:
- air duct - PVC pipe with a diameter of 125 mm up to 1 m long, inside - heat-insulating sound-absorbing insert;
- an external supply grille with a canopy of the rain damper and an insect net;
- silicone sealing ring for sealing inside the wall;
- double spring damper regulating the amount of incoming air;
- coarse air filter class G3 – G4;
- mechanical damper control drive;
- additional insulation, cover of the inner tip.

Reference. Ukrainian brand “Vents” offers products with a telescopic duct. The pipe extends to the required length, and is not cut to the wall thickness.
The supply device is embedded in the external wall, only the grill is visible from the outside, from the inside there is a head with the adjustment handle. The principle of operation is simple: the air from the street enters the pipe, is cleaned by a filter and exits through the slots of the head. Features of the valve:
- airflow dissipates along the wall toward the ceiling;
- street noises are absorbed by the insulating insert;
- the flap petals can overlap the duct section by 100%;
- adjustment is made by the handle or a special cord when the device is installed under the ceiling.

Clarification. Airflow on valves of other brands can be regulated using a plastic gate or diaphragm.
Product performance depends entirely on the traction force in the exhaust shaft, with a vacuum of 10 Pa, approximately 55 m³ of air enters the room in 1 hour. But the ventilator is able to let in more air. For example, you turned on a cooker hood, which easily “stretches” through the valve 150 m³ / h.
The advantages of wall ventilators:
- non-volatility;
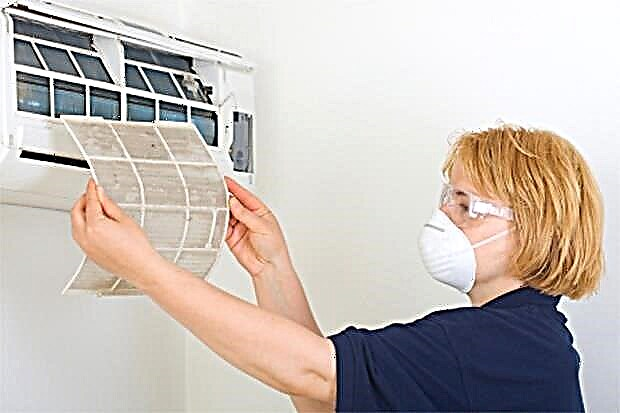
- reliability, frequency of service - 1 time per year (filter cleaning);
- affordable cost of the product;
- compatibility with any ventilation systems - natural, mechanical, combined.
In contrast to the many advantages, the passive supply ventilation valve has 2 significant drawbacks: it supplies cold air, plus it sometimes freezes at low temperatures. True, frost appears from excess moisture (condensation) remaining in the room for various reasons. We will consider this nuance below in the DIY installation instructions for the ventilator.
Overflow ventilation elements
An interior door with dense vestibules without a ventilation gap (or grilles) disrupts air exchange inside the apartment. If you block the flows moving from the living rooms to the exhaust shafts of the kitchen and bathroom, the ventilation in the house will cease to function.

The hermetic door between the rooms does not have to be modified - to put the grilles or cut the canvas. It is enough to integrate the supply and exhaust valve of this design into the partition:
- 2 decorative shades for a hole Ø125–160 mm;
- a hollow cylindrical insert of soundproofing material with a length of 15 cm;
- 2 mounting rings + coupling bolt.
Comment. Overflow valves are made only for partitions up to 150 mm thick - half brick plus decoration. On a thicker wall, you will have to make a homemade mount.
Heat recovery supply and exhaust valves
There are situations when in a private house initially there are no exhaust ventilation ducts. Room ventilation is also ineffective - the draft in the mines of the upper floors is quite weak. The problem is solved by installing reversible-type supply and exhaust units.
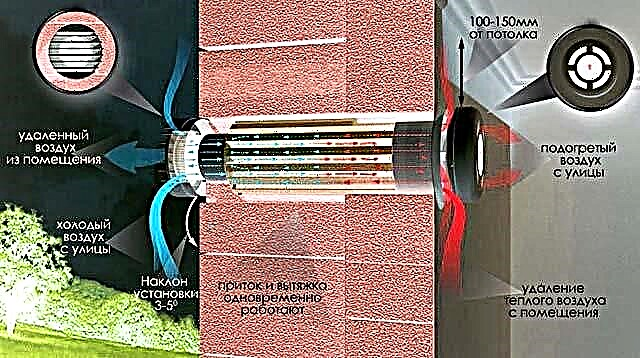
Structurally, the installation is close to the ventilator, only inside the pipe there is an axial fan and a ceramic heat accumulator, shown in the photo. The wall reversing valve can operate in 3 modes:
- Inflow only + outdoor air filtration.
- Only an extract from the room to the street.
- Heat recovery - combined mode, supply and exhaust works alternately.

The third mode is the main one. The algorithm is this: within 70 seconds, the fan drives the air from the room out through the ceramic heat exchanger. Then the reverse works - the fan starts blowing in the opposite direction, draws in street air, heated by the battery along the way. After 70 seconds, the cycle repeats.
Reference. Manufacturers implement changing the direction of the flow by 180 ° in 2 ways: by switching the rotation of the impeller in the opposite direction or by turning the fan itself with an additional servo drive.
Pros of operating a recuperator valve:
- no need to build exhaust ducts from brick, plastic or galvanized pipes;
- heated air comes into the rooms;
- in summer, the ventilation efficiency does not deteriorate;
- energy saving - the unit returns part of the heat expended by the heating system to heat the ventilation air;
- similarly, the unit saves the cold produced in the summer by air conditioning;
- adjustment of the quantity and temperature of the supplied air;
- selection of a model with the required capacity from 25 to 70 m³ / h.

The unpleasant minus of the supply valve with recovery is the high price. Judging by the reviews, it is this factor that prevents most users from buying this unit. Note that for proper ventilation you will need several household appliances - one in each living room.
Other disadvantages do not play a special role, even a high noise level. You will find out more information about the supply unit with heat recovery from the video:
How to install a supply valve - instructions
Before installation, it is necessary to solve 2 questions: where to put the ventilation valve and how to drill a neat hole in the wall. At the location we will give the following recommendations:
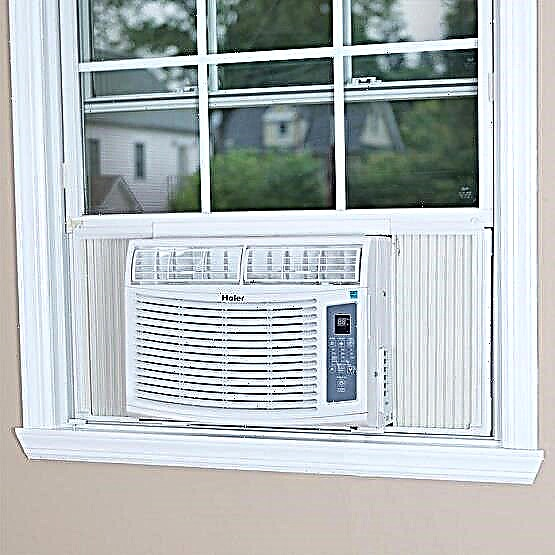
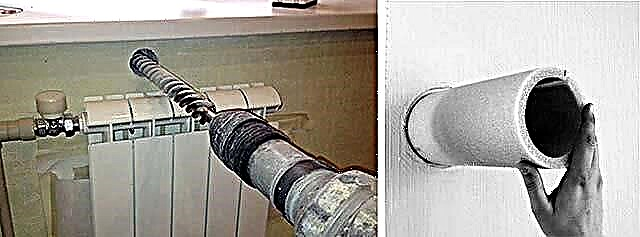
- Ventilators with a pipe diameter of 50-60 mm are best placed between the heating radiator and the window sill. Provided that there is enough clearance height.Then the cold street air immediately mixes with the upward convective flow from the battery.
- We install a device with an air duct over Ø100 mm to the side of the window opening, indent 30 cm (to prevent freezing). The second option is between the window and the ceiling, the minimum distance from the ceiling is 15 cm. In both cases, the ventilator is in the convection flow zone from the radiator.
- The height of the passive valve above the floor is 180 ... 200 cm.
- When installing the recuperator valve, observe a distance of 0.5 m from all structures - ceiling, window, nearest corner, as shown in the drawing.

- Place the transfer device in a convenient place without restrictions.

Comment. If the room is heated with warm floors, then the passive type ventilator can be attributed to the window at any distance, the minimum spacing remains the same - 30 cm.
Drilling a reinforced concrete wall is best entrusted to professionals armed with a machine tool with a diamond crown of the desired diameter. You can make a hole in the brick yourself, although you will have to tinker. With a long thin drill, do a lot of drilling around the circumference, then carefully knock out the middle.

Two important points. Before starting work, make sure that there is no electrical wiring or heating pipes laid in a hidden way in the selected section of the structure. Second: the hole is drilled with a slope of 2–3 ° towards the street to allow condensate to escape.
How to install the supply valve in the wall:
- We cut the air pipe flush with the design or with a small outlet - as prescribed in the manufacturer's installation instructions. The Vents telescopic duct is not cut.
- We insert the pipe into the hole, blow out the gaps with construction foam. Cement-sand mortar can not be used.
- We fix the grille with a mosquito net on the outside. We observe the correct position of the element - a visor at the top, the blinds are directed down.
- We insert a heat-insulating element into the duct, if necessary, cut along the length.
- We disassemble the valve head, attach the body to the pipe and the inner surface of the wall with dowels. We put the filter, dampers and cover with supply slots up.


The technology for mounting the recuperator valve is identical. First, an air duct is sealed into the wall, an external grille is fastened, then elements of the unit are placed inside - a ceramic heat exchanger, a fan and other elements. Differences: thermal insulation is mounted outside the pipe, a power cable is supplied to the fan.
Reference. There are models of ventilators with a fan powered by its own solar battery. An example is the Vents PSS-102 valve shown in the photo.

Why does the valve freeze
The phenomenon occurs in areas with low winter temperatures. The source of hoarfrost is condensate falling on the highly chilled surfaces of the ventilator. To fix the problem, you need to identify the cause of freezing:
- Natural fume hoods are ineffective or not functioning at all. Result: water vapor remains inside the room and partially goes out through the supply valve.
- The power of the heating system is not designed for infiltration (natural flow) of air by the supply device. The head is supercooled, moisture condenses on it.
- Violation of installation rules, for example, too close the ventilator is to the window, too much indent from the battery or insufficient pipe insulation.
- The tip is drawn up by too dense curtains, which is why a cold zone forms along the wall. A frost appears on the lid.
Among user reviews there are complaints about a drop in temperature after installing ventilators, literally - it blows strongly from the valves. We want to recall a simple rule: the air flow through the element entirely depends on the operation of the hood. Try to adjust the flow on the wall valve or partially block the exhaust outlet.

Finally, the importance of a full flow
In the “thermos” house with tightly clogged windows and entrance doors, the following occurs:
- indoor air is humid, heavy;
- it is stuffy for residents, windows often open for the purpose of ventilation;
- unpleasant odors are slowly removed from the kitchen and bathroom;
- gas-powered equipment - household stoves, ovens, instantaneous water heaters - does not work well due to a lack of oxygen.
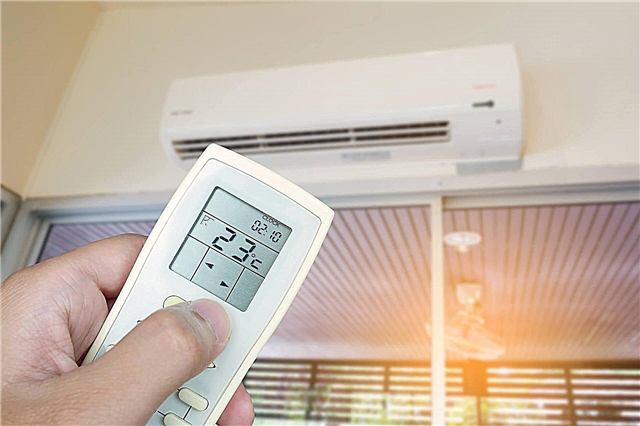
Note. An insufficient amount of inflow provokes an automatic shutdown of gas boilers - a draft sensor or flame ionization is triggered. Difficult ignition is also observed - the electrodes “sparkle” for a long time, when ignited, strong cotton is heard in the chamber.
The supply valve in the outer wall solves all of these problems. When fresh air enters the house, the hood is functioning properly. Ventilation elements are distributed as follows: exhaust ducts are located in more polluted rooms (kitchen, toilet), and intake valves in living rooms.